Wednesday, December 4, 2013

Finishing Touches!

I am so excited to move my dresser into my bedroom.
But even more so excited to clean up my closet and finally unpack my clothes from garbage bags I so frantically packed the day we moved out of our rental.

With some help from my future husband, I spray painted the original handles in a flat black on an old pallet he moved out of our back yard.


I didn't want a shiny black because I wanted to give it vintage flare, so I went with Rust Oleum Flat Black.

After my coat of primer, it took 3 coats of Valspar Ultra White paint and primer.
I painted the first coat with a roller, but realized I used my last roller and let it dry out before I could put the second coat on. So I had to do the second coat with a paint brush.
My FAVORITE thing to paint with is a foam brush, which is what I painted the 3rd coat with. 

With my 40% off coupon app for my phone I picked up a variety box of about 12 from Hobby Lobby for under $5! I use them for every project.
I'm so weird about paint brush strokes, and this is the perfect tool to avoid crooked paint brush stokes.
Andrew (my fiance) also helped me screw the hardware back on the put the drawers in.


 I LOVE the way it turned out!


Wednesday, November 27, 2013

French Louis VI Chair

I'm a little obsessed with the French country/provincial look. 
The creams and whites really make my home feel cozy and inviting!

I was driving home over the summer and at a random thrift store on the side of the road of all places I found these two BEAUTIFUL French Louis chairs!!!! 

OK, so I won't go straight to calling them beautiful, but their bones and structure were so fabulous, I knew I could make them beautiful!


There is nothing pretty about purple velvet and black to me.

So I grabbed some pliers and a vice grip and got to work! I made sure not to tear the fabric too bad so that I could use it as a template when it came time to reupholster in the fabric of my choice.


I have a can of Valspar paint from Lowe's that I paint all of my furniture with. 
It took two coats to make sure all the black was covered.


I was going for a more antique/vintage/worn look and busted out my trusty Annie Sloan stained wax to give it that finish.
To apply, I took an old ratty t-shirt and ripped the sleeves off. With the stained wax, less is more!!


There is a fabric shop that was just right down the street from our rental house called Renees.
This little old woman from somewhere in Europe orders her fabric from overseas and has it shipped to her. I could spend hours in her store!

I eventually found exactly what I wanted. 
After a few youtube reupholster 101 videos, I started my first reupholstering job.


I knew I wasn't skilled enough to put piping back on the seams so I thought I would give nail head a try
I didn't think that individual nail heads would cover the staples, so I did some research on faux nail head trip. I found some 16 ft nail head trim from Ebay.

It was fairly easy to put on the chair, and it went around the rounded edges exactly how I wanted it to!
I will say I had to pull a few of the real nails I had to tack it on with out because they went in crooked.

I didn't have a mallet so I had to improvise

I had to borrow my moms fabric cutter that looks like a pizza cutter to trim off the excess fabric. 
And after about an hour of nailing, my chair was finished!!!


The picture doesn't do it justice. 
I'm so happy with the way it turned out!


Step by Step, Day by Day


In my last blog I introduced my beautiful French Provincial style 9 drawer dresser.
After countless Internet searches & early morning trips to yard sales, I finally found exactly what I wanted. 
Good things really do come to those who wait.
--And I'm not a girl that settles for the next best thing..
So about 40+ Lysol wipes later, I've cleaned this baby up and I'm ready to start my painting process.
 
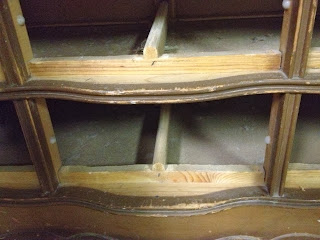
Here's how it looked the first day I brought it home.
 
 
I'm a huge fan of this blog by a fellow DIY'er Virginia. We have very similar taste and I took some painting furniture tips from her blog Here
 
After the cleaning comes the sanding.
I like to sand all my furniture pieces to remove the shine from previous paints and stains.
Not to mention it helped to remove the gum crustified on top that no amount of Lysol wipes could conquer.
As well as buff out any of the abuse my furniture finds have taken over the years.


Christmas came early this year at my house!!
My dad gave me my very own palm sander and I am SO excited!
This one is rounded and spins on a 360* rotation. It makes sanding rounded corners much easier.
 
 
THANKS DAD! :)
 
After I coaxed my fiance into taking off the original hardware, I got a jump start on sanding.
The point of sanding furniture isn't to sand until all the paint/stain comes off, its just to give it a rough surface for the new paint to have some grit to grab onto.
 
I made sure I took off the shiny lacquer but didn't sand it down the the wood.
I didn't want to reshape the peice, just give myself a good base to work with.


After a little debate with myself, I was ready to prime in gray instead of white.
Because I have painted all of our other mixmatched pieces in our bedroom View them Here, I have lots of left over paint from previous projects.
Because I wanted a crisp clean white for this piece. I decided to go with some leftover gray primer in the hopes that it won't take too many coats of all white to cover the previous stain.


And I'm really glad I did. The last all white piece of furniture we tried to prime with white, took another 4 coats!!!! --Nobody's got time for 4 coats!


All 9 drawers took less time than it did to paint the whole dresser!
 

The more I primed, the more I wished that I would of gone ahead and sanded the entire drawer.
If and when it warms up I will sand the entire drawer and prime to paint both the outside and inside.

It's been about 20 ish degrees the past few days, and I haven't gotten back outside to finish painting!! Check back to see the finishing touches!!


Thursday, November 21, 2013

The Quest for the Perfect One


We moved into our 1989 home in September 2013 and LOVE it.


 Between my college apartment furniture and his hand me down furniture not one piece of furniture in our house matches. But between the two of us, we have a bed, two night stands (that don't match) and a 3 drawer dresser that has two purposes: holding clothes and holding the TV. Because we have all these mix-matched furniture, I went to our Lowe's and bought some paint. I'm all for a mix of pieces, but they're going to look like they go together!
 
 
Our bedroom color is Valspar Polished Silver, and we love it, so I chose to go with black and white furniture pieces. But I get bored with just plain Jane, and wanted to mix it up!

This is one of our side tables


I striped it to give it a little bit of life. I love black and white. It's classic to me
 
I chose to do a Harlequin pattern so that I could really make the original hardware pieces of this piece pop against the black!
The side panels were the perfect place to put my pattern.
I painted the side panels white, and then got a piece of cardboard and made my template and stenciled the pattern on in black.
I'm sure there was an easier way to do this, but I free handed the pattern.
I think my flaws give it character! --at least that's what I tell myself to avoid OCD meltdowns on really tedious projects.
With a little bit of sanding and destressing, I roughed this baby up and love it.
 
SIDE BAR: Before we moved into our house we rented a 1920 historic home with TONS of storage, and we had no need for a dresser. Now, in our new home we are fighting over shelving in our walk-in closet.
 
I do this often, and in my mind picture exactly how I want my rooms in my house to look. I sit on the couch in the living room and think to myself. Why did I hang that there? It would look better over on that wall. But I had to make a promise to myself, to only work on ONE ROOM AT A TIME!
 
This "promise" I made to myself was for my living room... that's a whole nother story I will get to later.
So, back to this story. I joined a facebook group where the county we live in has it's own version of Craigslist.
I check it daily, sometimes more than 5 times a day hoping I might come across and be the first person to find what I've been dreaming up in my head as the PERFECT dresser.
 
I wanted a dresser with legs so that it stands up above our carpet and in my perfect fantasy, it would have the French Provincial rounded drawer look. We would get up on Saturdays and hit all the estate sales and yard sales for months. I would go cross eyed checking the latest furniture listings on Craigslist and Facebook. When yesterday.. low and behold...
MY PERFECT DRESSER HAS BEEN FOUND!!!!
 
With my charming negotiation skills (not really), I scored this baby and another piece for a STEAL! I am so excited to sand her down and paint her to be beautiful again!
 
This is my first shot at blogging, so please check back as a post my journey on making this dresser apart of my mix-matched, yet matching bedroom.
 
XOXO -KL